How to Create a Tilburg.ai chatbot!
Welcome to this tutorial on how to create a chatbot! Creating your own chatbot course may sound like a daunting task. But as we’ll show you in this tutorial, we’ve made the process as easy as possible. We’ll take you through the process step by step, and throw in some best practice tips along the way, so that your personal course assistant is as well-prepared as possible. If you're unfamiliar with what a chatbot is, here's our definition in one sentence: With our chatbot students are able to ask ANY question about the material you have uploaded as a teacher, and they will receive a precise answer based on and with actual references from your material.
Before you start creating your own chatbot, you probably have a lot of questions. We will do our best to answer them in this tutorial. But don't worry, if we don't cover your specific question, you can check our FAQ or feel free to contact us.
What is a chatbot
Before we get started with creating a chatbot, it is important to first get a clear picture of how our chatbot will support you . The chatbot we create in this tutorial will primarily function as a question-and-answer beacon for students as they prepare for exams. It can answer general questions such as when the exam is (provided the syllabus is uploaded and included here). This is in contrast to generic AI, which answers questions based on probability. An important aspect of the Tilburg.ai chatbot is that the chatbot will cite its sources. This makes all its answers verifiable, consequently students stay closely connected to the course material, while you retain control.
Therefore, you are the one pulling the strings by uploading course material. For example, if you only upload the syllabus, you will have a course assistant who will answer all the questions surrounding the design of the course questions. When uploading specific documents for a project, think of the assignment and the associated context, and you have an interactive project chatbot. But as mentioned before when uploading your canvas material, it will mainly function as a question-and-answer tutor for students.
What is possible?
This chatbot is not limited to one function. Feel free to extend upon the following ideas:
- Create an FAQ chatbot to reduce frequently asked questions.
- Use it as your own think tank. Upload your own book, and save the information you wrote earlier!
- Design an interactive assignment supervisor that guides students through a work college or assignment (for example our ArrestHelper).
Our specialty is of course the chatbot. But the chatbot can also be used for specific applications, take a look at our chatbot portfolio for some examples. If you are interested in a specialized chatbot, or have questions about what is possible in a sparring session please feel free to contact us
How to Create a chatbot!
Step 1: Login
When you log in with your Tilburg University account, you as a lecturer are immediately recognized as an employee of the university and you get access to a personal dashboard. Within this portal you have the possibility to create your own chatbot.
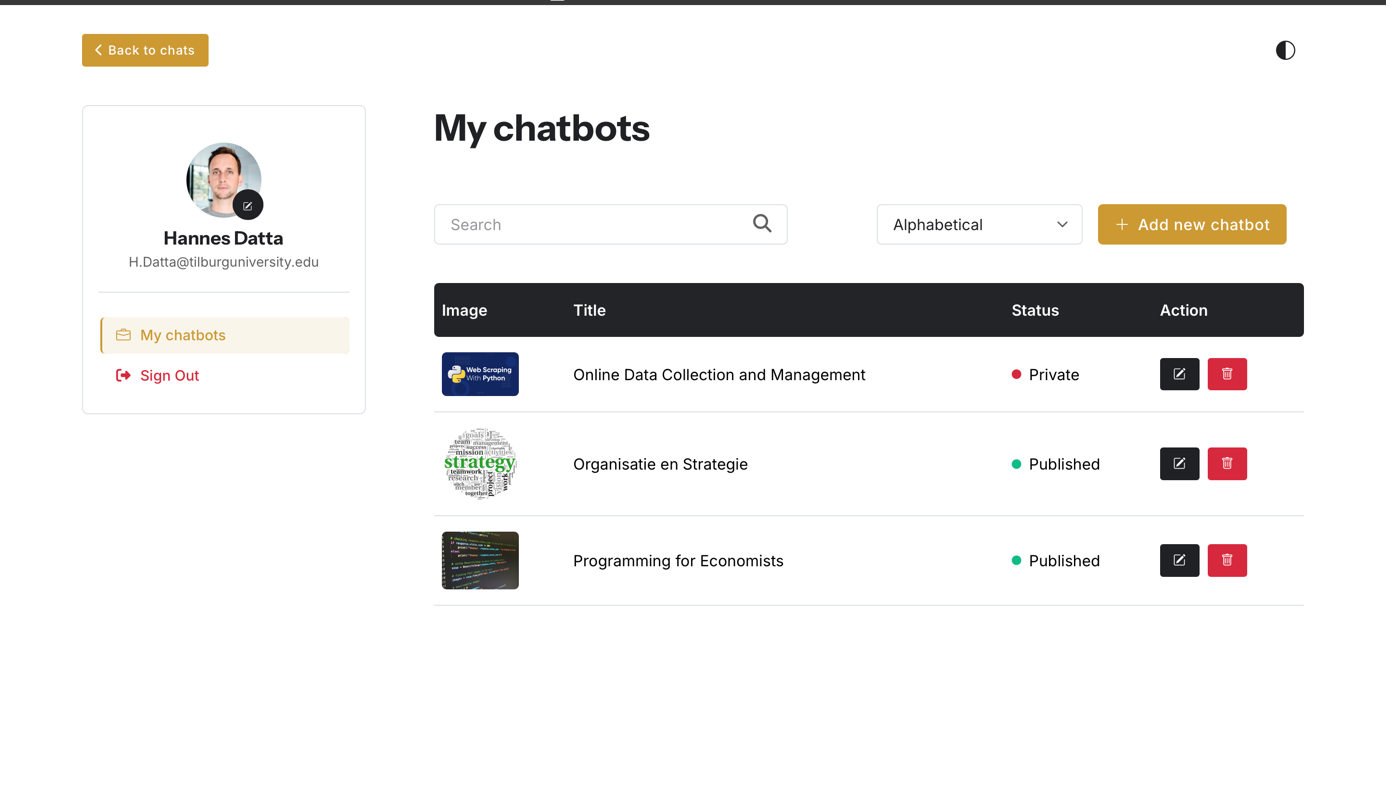
Inside this dashboard, you can manage your existing chatbots. The interface allows you to control the visibility and accessibility of each chatbot through two distinct settings. By default, new chatbots remain hidden with status private, meaning you are the only person who can access them. This provides a secure testing environment before deployment. When you set your chatbot to public, students have access, provided they have received the chatbot link from you (via Canvas for example) and have logged in with their Tilburg University account.
You can create a new chatbot via the "Add a new chatbot" button located in the top right corner of the page.
Step 2: Upload Files
You will now be taken to the page where the chatbot is created. Enter the desired chatbot title and a welcome message. After that, you can add starter questions for the chatbot. These questions help guide students on how to use the chatbot, so think carefully about which ones you want to include. Finally, enter your course name.
The chatbot operates exclusively with the materials you upload, therefore, consider your content strategy in advance. Determine what specific resources you want the chatbot to access, such as syllabi, presentation slides, assignments, and papers, and evaluate the appropriate level of detail required. While bullet points in slides follow presentation best practices, they sometimes lack sufficient context. Consider supplementing your slides with more related documents to provide the chatbot with a richer information base from which to generate responses.
The more related materials you upload, the more extensive the chatbot’s knowledge base becomes, expanding the range of information it can extract. Through RAG (Retrieval-Augmented Generation) technology, the chatbot establishes connections between various source materials, enabling it to synthesize information across different documents.
We support the following file formats: PDF and Audio files.
Sliding Window Technique: When loading documents, the chatbot uses a sliding window to better understand context. Instead of analyzing just a single page, paragraph, or sentence in isolation, it also considers the surrounding text, both before and after. This allows it to establish connections within the document, linking past statements with upcoming content, ultimately providing more nuanced and contextually relevant answers.
File Naming Conventions
We would like to share some tips on naming files effectively. Please use clear and descriptive names for your files. For example, use names like slides_week1 or syllabus to make it easier for students to reference specific materials.
This allows students to ask questions more precisely, such as:
"Can you explain the diagram on page 5 of slides_week5.pdf?"
Example:
- ✅ Correct:
syllabus.pdf,slides_week1.pdf,opdracht3_instructies.docx - ❌ Incorrect:
document123.pdf,week1_final_v2.pptx,2024.icnlsp-1.42.mp4
By following these naming conventions, students can quickly locate and refer to the correct resources in their prompts.
Step 3: Share your chatbot With Students
Once you have clicked "Create Chatbot" again, your chatbot will be ready within minutes. Now it's time to share it with your students.
You will a link, that redirects students to the chatbot. By entering the link once and logging in with their Tilburg University account, they will gain access.
We recommend distributing the link via Canvas to ensure easy access for all students.